Showing posts with label 50in2009. Show all posts

Saturday, January 02, 2010

In Which I Finish.

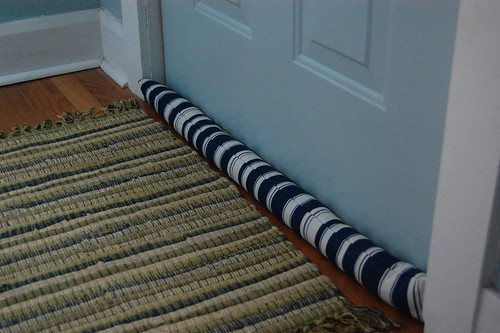
Front Door Draft Stopper
Project #50 in '50 in 2009 Challenge' - Front Door Draft Stopper

Ahhh, look at that!

50 projects completed in 2009, how's that for following through?

I'm not sure how I got the idea for making a draft stopper for our front door, but it came to me and it was the perfect last project of the year. Easy, which was essential considering I only had a couple day left in the month.

I actually made another one today (a bit more complicated because it stops up both sides of the door, to use on our basement door that we use as our main entrance), which jump started my mission for 2010 - "2010: The Year of Finishing Things," which includes finishing up my various stashes (and by finishing up, I mean destashing).

So instead of trying to complete 50 projects this new year, I'm just going to focus on getting things done, crafty or otherwise. Rather than share my personal New Year's Resolutions (I've been sharing a bit too much here lately ::cough cough weekly weight updates cough cough::), I've decided to outline the things I want to get done...at least so far. I'm sure the list will just grow longer & longer as the year goes on. Hopefully I'll be successful in knocking things off as well.

- knit a winter hat to coordinate with my french yarn scarf
- use my italian yarn to knit mittens
- my May One for Me, One for You quilt square
- my June One for Me, One for You quilt square
- my July One for Me, One for You quilt square
- both August One for Me, One for You quilt square
- put together, bind & quilt my One for Me, One for You quilt
- finish the AFI Top 100 films (so close, so very very close)
- finish cataloging my PEZ collection on Flickr
- declutter the house (got a great start, just need to finish up the basement & lightly go through the rest of the house)
- deplete yarn stash to fit in my wicker laundry basket with room to spare
- deplete fabric stash
- update my inspiration books completely
- transfer our favorite recipes onto cards
- complete the sock monkey blanket

Big list so far, huh?

Friday, January 01, 2010

We'll Always Have Paris.

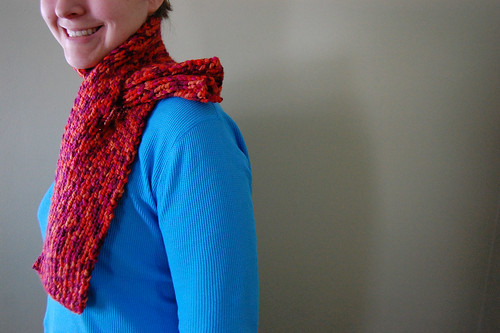
Gay Paree City Scarf
Project #49 in '50 in 2009 Challenge' - Gay Paree City Scarf

My big souvenir while in Paris this fall was yarn. I figured it was the perfect momento, it's pretty, it triggers the memory, it's not some little trinket to clutter up the house and it gives me something to do. That's like 4 positive aspects, so it must be an awesome souvenir, right?

In a somewhat nightmare trip to Le Bonne Marche, I picked out two different yarns this bulky Bouton d'Or (French yarn to remind me of the fun we had in Paris) and a fingering weight Phildar Lambswool (in purple that reminds me of the time we spent wandering the streets of Rome and Venice).

Though I don't typically stray from the worsted and sport weights, I was drawn to the bulky Bouton d'Or for it's beautiful mix of oranges and purples, so I had to pick it up. It ended up being a bonus that it feels really great.

It has taken a few months to finally get the time to make something for myself using the yarn, but I've been thinking about digging in since returning. I mean, I even bought a new nice winter coat to showcase the scarf I planned on making with it.

The coat is another story, but just let me say that I LOVE my new cream wool funnel neck coat. As I walk around downtown, amongst the sea of black and dark gray coats, I feel a million times happier than those people look.

So anyways, as December wound down and all my Christmas presents were wrapped up, I got to work (perfect timing with all the car time we had for the holiday). I used the Windy City scarf pattern from Stitch N Bitch knowing I was most likely going to have a short scarf as I only had three balls. With the keyhole, it would be sure to stay wrapped around my neck even if it was short.

In the end, I would have loved for it to be just a tad bit longer or had the keyhole positioned slightly further up so my ends would be even, but with a little finagling, I can make it look that way.

Now I just have to get on those mitts I have planned for the "Italian" souvenir yarn and make myself a new hat that won't horribly clash with the scarf. Hopefully those can be finished before the winter ends. Hmm, maybe I should make the hat first. Ugh, what am I saying? I can't believe I'm even contemplating knitting another hat so soon. I went to the "fancy" yarn store yesterday to pick out yarn to coordinate, so all I need to figure out is a pattern. And despite my record with hats as of late, I'm thinking I could pump out a hat faster than flip-top mitts (which I plan on knitting 2-at-a-time on circulars, just got a book on how to do socks that way so I'm hoping mitts can work the same way) so at least I would get use out of them and not have to wear my little snowboarded skullcap anymore which really takes away from the pretty cream wool coat. I'm ok with keeping the black glow-in-the-dark skeleton gloves for the time being, but the hat I'd like to change. I've been a bit spoiled with my bubble yum pink button-tab so far this winter. It's not so tight that is gives me hat hair, so I don't feel the need to pull my hair into a pony-tail when I take it off.

I guess only time will tell wear the new year takes me, right? ;)

Tuesday, December 29, 2009

For the Kiddies.

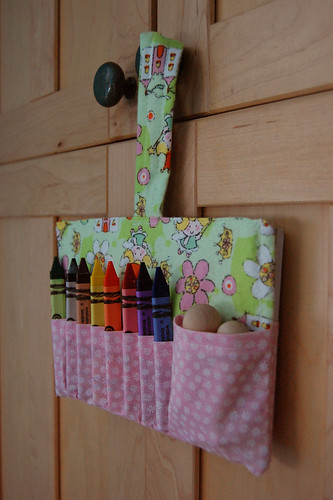
Activity Satchel - Front
Project #44 in '50 in 2009 Challenge' - Activity Satchel

I admit it, I am one of those aunts (godmothers, adults in general).

I will try my darnedest not to give you the overly commercialized, plastic toys that you crave for your birthday or Christmas if you are a kid in my life.

As a kid in my life, you can expect books. When not books, handmade toys. When I can't find an appropriate book for the occasion or don't have time to make a handmade toy, you will most likely get some sort of activity to do - like an age-appropriate craft or a coloring books with crayons or if you're luckily a board game.

I can't say I'll keep this up when I eventually have children, but I like to think I will. That my home won't be overrun with brightly colored, breakable, plastic toys. And until then, I'll inflicted the wee ones in my life with my ideals.


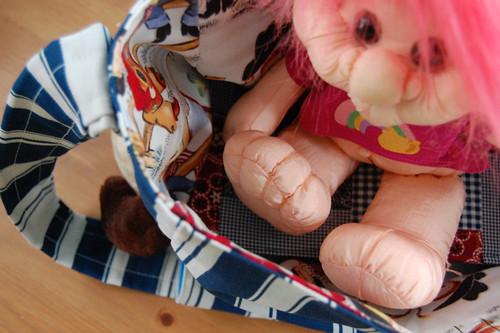
Rodney & Chomps Carrier
Project #45 in '50 in 2009 Challenge' - Rodney & Chomps Stuffed Buddy Carrier


This Christmas I only crafted two gifts for the little kids in our lives (only our nephew, Braydon and Mike's cousin's daughter were lucky enough to make the list this year). The first being what I dub an "Activity Satchel" for a tiny little, princess-obsessed two-year-old who would be joining us for Christmas Eve dinner out at a restaurant. I figured she wouldn't be as quiet as she had been in the previous two years, so what better gift than one that could be put to use right away. This satchel is a simplified version of the Travel Activity Tote I made Bray a couple years ago, this time with only a pocket for a pad of paper on one side and 8 crayon pockets & a peg people pocket on the other. A simple loop handle fit for a small hand. And that was it. Compact enough to fit in mom's purse, but packed with an hour or so of continuous fun.

Happily, it was well received. She was able to rip it open almost immediately upon us entering the house and as the paper came out, little cries of "Crraaayoonnns!" were exclaimed and then she proceeded to go through at least 10 pieces of paper in the few minutes before we left the house. Luckily the restaurant table was covered in white paper so she didn't end up blowing through the entire pad in the one night.

A pond stocked with fishes for Chomps, the alligator
A rather bad photo showing the special Chomps compartment.


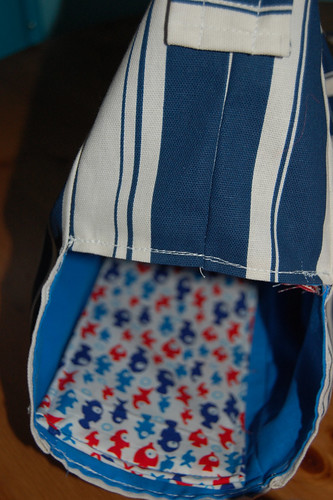
The second gift I whipped up was for dear little Bray, who asked me before Thanksgiving if I could make him a special carrier to hold his two best buddies, Rodney the reindeer and Chomps the alligator. According to my sister, they had been out and Bray said, "Mommy, I miss Rodney & Chomps. I wish I could bring them with us." So Aunt Sarah got the call. At Thanksgiving, I took Bray to the fabric store to pick out any fabric he wanted for his bag. On the way there I was asking him what his favorite color was and if he had a favorite pattern (like stripes or polka dots) and he rambled on like only a soon-to-be-5-year-old can. Then as we started to walking through the aisle, we came across a large, dark blue striped home dec fabric and Bray exclaimed, "that's it Aunt Sarah, exactly the fabric I was telling you about!" Sadly I wasn't able to get the bag, which is of my complete own design, done in time for his birthday, but I needed to get his mom her hats and then time just slipped away until it was the weekend before Christmas and I realized it was now or never.

So last weekend I got to work whilst Harry Potter movies played in the background. It only took 3 HP movies to complete (#2, 3 & 4 for those who are interested - #1 was used in making the Activity Satchel), but it was completed in plenty of time to give at Christmas.

This bag was quite a doozy to work on. First my measurements of the stuffed animals were off, way off. As I cut out all the fabric needed for the outside and full lining, and then started to sew it together, I realized that I had an enormous bag on my hands. Like too big for even my body, let alone a 5 year old, so I had to much adjustments after having the entire outer bag sewed up. I'll just say it involved cutting off several inches of height and then sewing the side width in half. Second, I had a very specific vision for how I wanted the bag to work. It would resemble a tote bag with a long messenger bag style handle, but then it would have a side opening on the bottom appropriate for a long horizontal stuffed animal to sit and then a shorter inner lining that would act as a seat for our long time bud, Rodney. Since Chomps is an alligator, and I just so happened to have fishy fabric, I decided that Chomps needed a water based environment. The bag was lined in a watery blue and then I created a heavy interfacing base wrapped in fishy fabric that not only acts as food for Chomps, but also as structure for the bag.

In all the Christmas excitement, the bag didn't get nearly as much awe as it deserved. How can I compete with Bakugan & a real flying helicopter?! It was tough to get a picture of the little monster wearing it with his buddies stowed away. Though it didn't receive the Christmas glory, knowing how much Bray loves his Rodney & Chomps, it should get plenty of use. And that's what really matters. :)
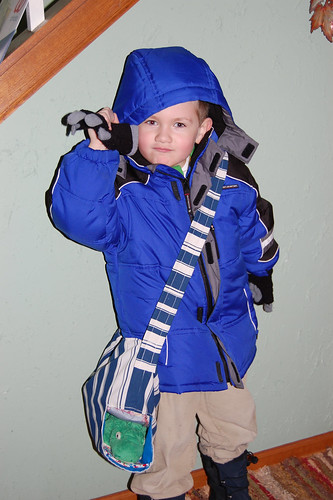
Bray & his Stuffed Buddy Carrier
Bray modeling his carrier (again) before heading out on Christmas Eve.

Sunday, December 27, 2009

The Easy Way.

Super Chunky Christmas Cookie Mix
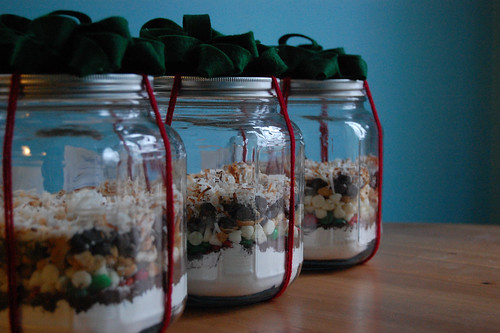
Project #46 in '50 in 2009 Challenge' - Set of 5 Super Chunky Christmas Cookie Mix in a Jar

I admit, I took the easy way out this year.

Instead of devoting a weekend to baking Christmas cookies to give out as gifts, I took inspiration directly from Rachel Ray Magazine and layered the ingredients in pretty jars and made my friends & family do the work.

I like to think I'm giving those friends and family members a chance to make cookies at their leisure because if they're anything like me, they come home from every event with a package of more cookies than they should be eating.

Plus they get an awesome jar!

I should send a shout out to the cashier at Hobby Lobby for considering the 3 I bought there as "decorative glass" and giving them to me for 50% off.


Felt Christmas Bows
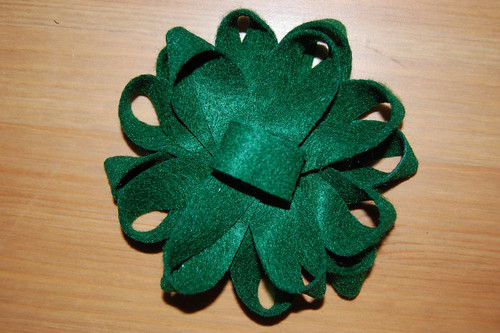
Project #47 in '50 in 2009 Challenge' - Set of 8 Felt Christmas Bows

You can kind of get a sense of my wrapping scheme this year as well by looking at the line of jars. I wrapped the majority of our gifts in brown kraft paper (until I ran out the night before we left and had to run to the grocery store and grab the cheapest non-blatant Christmas paper available) and wrapped a few strands of deep red yarn around instead of a ribbon. Simple, crafty, and very much the vibe I wish to give off at Christmas. Then a lucky few received a handcrafted felt Christmas bow in a deep forest green.

I saw a blog post by Twig & Thistle earlier in the month taking a tutorial by How About Orange for making package bows out of magazines and using felt instead, and I thought it would be an elegant way to finishing my simple packages. I had grand plans of making one for every package we were giving out, but alas, I started only on Monday night and then forgot to pick up more sheets of the craft felt sheets when I ran to Michaels on Tuesday before craft group. Oops.

I ended up topping each of the cookie mix jars with a bow and then placing one on a package for my mom, sister & mother-in-law figuring they would most likely actually reuse them which was the intended dual purpose.

They're super easy to make, especially assembly-line-style, plus they gave me an excuse to break out the hot glue gun which doesn't get much use around these parts. I'm thinking I might use some of my stashed craft felt to make some more. None of my colors are really Christmasy though, so I'm not sure how much use I would get out of them. They might actually become clutter in a different form. Maybe I'll just put that idea on the bottom of the list and if I need something to do, the idea will be there.

Saturday, December 26, 2009

No, I Can't Buy You a Dishwasher.

Homer Simpson Dishcloth
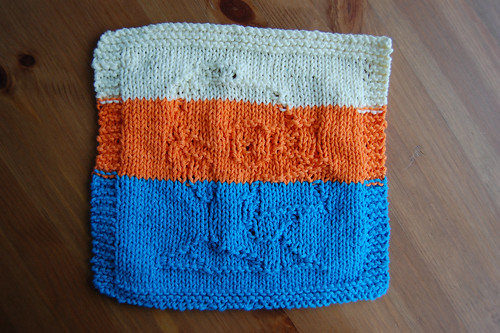
Project #43 in '50 in 2009 Challenge'- Homer Simpson Dishcloth

Several weeks ago when I asked my brother-in-law what he would like for Christmas, his response was a dishwasher. I told him, surely you know I can't buy you a dishwasher, but I did get an idea of what I could give him - my most favorite cleaning device ever - a pot scraper* (like seen on the left of the second image in this post).

So I didn't end up only giving him a small 89 cent piece of plastic for Christmas (ok, plus the magazine subscription he requested), I decided to knit him up a couple of dishcloths to make a nearly complete dishwashing system.

Plus it would give me a chance to use some of my cotton stash as I've decided 2010 will be the year of finishing things (including my stash of yarn & fabric - I've finally realized that I will almost buy new materials for a new project), so why not give myself a bit of a head start.

I really enjoy doing patterns like this Homer Simpson dishcloth because with every row changing, it holds my attention and I don't tend to space out and make mistakes. Weird, I know.

I started with one of my mid-size balls of left over cotton, thinking I could surely get an entire dishcloth out of it. But as you can see, that didn't happen! Man, my eye for estimation is going out the window. And the funny thing is it happened again with the next color. A good thing for the stash busting though.


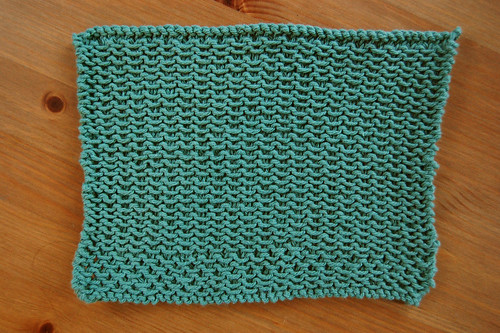
Chinese Waves Dishcloth
Project #48 in "50 in 2009 Challenge" - Chinese Waves Dishcloth

And since one dishcloth certainly could not be enough, I had to make him a second. Actually, I would have preferred that there had been a third as well, but considering I was knitting the Chinese Waves the morning of the day we left, I just didn't have enough time. You may notice that it's a bit squatter than what you may normally see with a dishcloth. That's because I decided I needed to have it done before we left so I could work on the last two projects of the year during our drives, so I could actually make it to 50 this year. It's probably easier to handle as well. I mean, it is only a dishcloth. There are no real size requirements.

The Chinese Waves pattern confused me a bit. You were only given four rows of the pattern, but when I went to repeat the 3rd row (the 4th was just a straight knit), it messed up the look of the pattern. I must have messed something up, but I couldn't figure out what I did wrong, so from there on out I just repeated rows 1 & 2 until it was large enough to stop. I say, oh well, it's only a dishcloth to be used on gross, dirty dishes. It doesn't need to be perfect.

I see a lot more dishcloths in my future. As I mentioned before 2010 will be my year for finishing things (so no '50 in 2010' - I need a break from the stress of trying to make it to the magic number). Though I'd like to say I'm going to clear out the yarn stash I have, I know it's not practical, I'm just not that fast of a knitter. But I do think I can clear out the stash of cotton I have, so it is very possible that everyone will be getting dishcloths next Christmas. Though then again, maybe all my cotton won't yield as much as I think it will.

We shall see. We shall see.


*I can't remember if I've touted the amazingness of this cheap piece of plastic before. We got ours at Ace Hardware, seriously 89 cents. Gets all the burned on crap off without having to use sponges or copper scrubbies, and you just throw it into the utensil basket to clean it right up. Copper scrubbies are great, but can get disgusting really fast, making me want to toss them before they were fully used. I cannot recommend the pot scraper enough, a much more environmentally-conscious method for cleaning dishes (I also find I don't need to use as much running water to rinse & scrap as I did to rinse & scrub). And hey, some hand knit dishcloths don't hurt either - I find them to be much more effective than store bought ones.

Wednesday, December 23, 2009

And Then There Were None.

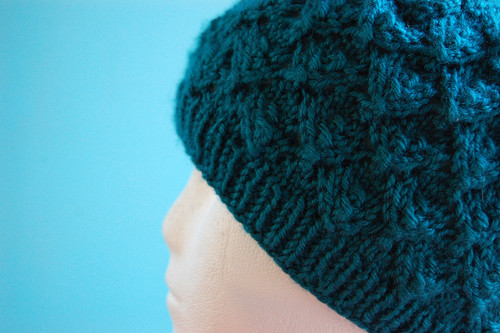
Teal Foliage Redeux
Project #42 in '50 in 2009 Challenge' - Teal Foliage Redeux

I'm happy to say 2009: The Year of Hats has come to a close.

Thank goodness.

As much as I'd like to say that it will be a very long time before I knit another hat, I know that I'll be knitting myself one in the new year to coordinate with my French Yarn scarf, since the Bubble Yum Button Tab clashes horribly.

But for now I am done.

And since I sent this off a couple weeks ago, I have been hard at work crafting away for Christmas. My personal Christmas crafting load has been light this year, but has kept me quite busy - even up until this morning before we headed up north for the holiday.

The funny thing about this Foliage hat is it works up wonderfully when you pay attention, keep count and do gauge. I used the same yarn as my first attempt, but this time I did gauge swatches until I reached the right results. I ended up having to go down 3 needle sizes - yikes, no wonder the last hat was so big! Knowing that it was easy to gain and lose stitches, I kept count every patterned row (which is every other row)and didn't mess up...until the last five rows or so. Ugh, I was so pissed, but I was able to go back and fix the mistake when a problem did arise.

I was doing so well, but December was quickly slipping away and I hadn't started any of my own handmade gifts, so I was getting impatient. The end was so near and I was determined to finish on craft group night. I was quickly binding off, trying to finish before Panera closed for the night. I finished up leaving the last couple stitches on the needles (thankfully) to weave in the ends at home, and headed out. Upon getting home, I tried to put the hat on and was crushed. I couldn't even get it on my head. Hoping it was just my big head, I ran to get my StyroHead, but alas no luck. Another lesson learned. Remember to bind off in pattern (in this case K1,P1), not only will it look more cohesive, you won't negate all the work you've done (in my case, I made a ribbed band to add stretch and then completely negated it with a tight bind off). As I noted, thankfully I had not finished binding off. I still had a couple stitches on the needles so it was easier for me to undo my bind off and then redo it properly. Once it was completed a second time, it fit like a dream. Despite being a nightmare (haha).

Hopefully it's well received.

My sister asked how much she owed me for knitting all these hats, and I gave her a price per hat but couldn't just give her a total...because I couldn't remember how many hats she actually ended up with since I've knitted, ripped out, reknit, etc. I think she ended up with 6 hats, but I've probably knit up at least 18 hats fully. A little scary, if you think about it. I usually recommend that new knitters start with a hat, but after the year I've had with hats, I may have to come up with a new recommendation.

Thursday, December 17, 2009

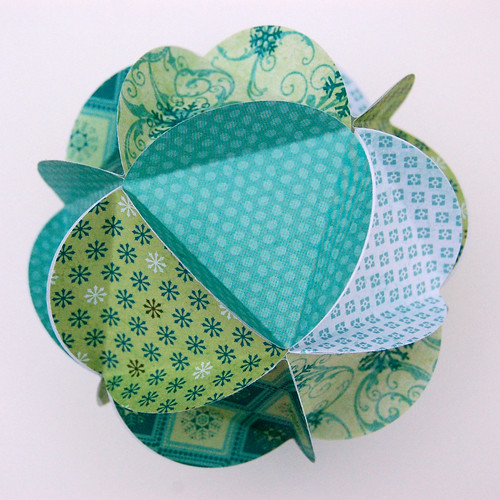
Christmas Balls: a tutorial

Christmas Balls
Project #41 in '50 in 2009 Challenge'

When I started my new job three weeks ago, half my first day was spent making decorations for the office. Fun, huh? I ended up making 4 of these ornaments in the few hours we worked on them in various Christmasy colors. And then we hung them in our front windows looking out onto the plaza.

These are really elegant ornaments when finished, especially when hung at varying heights. But boy were they a little tough to figure out. Kudos to our Project Manager (and her mother) for figuring out the construction for a tiny picture off the internet.

To make one for yourself, you'll need:
- pretty paper
- approx 3" circle punch
- glue sticks
- a card stock equilateral triangle template (where all the points will touch all the edge of your circle)
- hole punch
- ribbon

1. Punch out 20 circles in various coordinating patterns
2. With the pattern side up, place your triangle template on the first circle and fold the "flaps" on each side of the triangle.
3. Repeat for the remaining 19 circles.
4. Take 5 folded circles and start gluing together (remember pattern side out). You will want all to be glued in the same direction - you'll be creating a 5-sided cone (it will kind of look like a yarmulke, especially if you're drinking mimosas).
5. Create another 5-sided cone with the next five folded circles.
6. Take one of your cones and turn it upside down. Start gluing another 5 folded circles onto the top flaps.When completed, you will have a dish with 5 crown-like points.
7. Repeat step 6 with your second 5-sided cone.
8. Your two "crown" piece can now be interlocked together - points into valleys (like monster teeth you draw when your little) - so glue the remaining flaps to adhere your two "crowns" together.
9. You now have a festive Christmas ball! Punch a small hole in one flap and attach your ribbon and hang in your windows or from your mantel.

PS: I thought I should add, I can't guarantee that this ball is one of mine. We all used the same types of papers and in doing 4, I did many of the available colors schemes that other co-workers did as well.

Friday, November 27, 2009

And Then There Was One…

Bubble Yum Button-Tab Jr
Project #40 in '50 in 2009 Challenge' - Bubble Yum Button-Tab Junior


Thursday, November 26, 2009

And Then There Was Two...

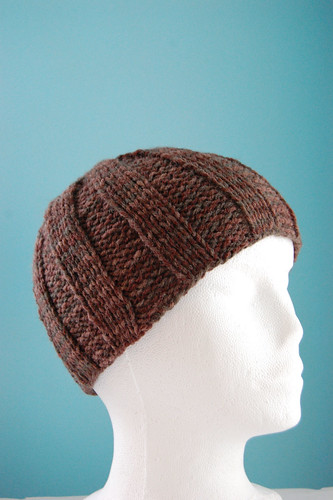
The Brock Boy Hat
Project #39 in '50 in 2009 Challenge' - The Brock Boy Hat

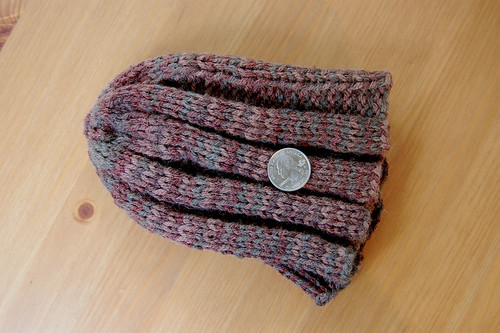
It amazes me how much a knit can stretch every time, which is perhaps why I've been having so much trouble with these hats. I just can't seem to wrap my head around the fact that something can stretch to well over twice it's original size and work well.

But with this hat I had to.

The Brock Boy Hat for size

See.

When laying flat you think, well that surely won't be able to fit anyone but a baby. But it fits the dummy so well, and I'm even able to get it on my head without looking all stretched out and uncomfortable.

So lesson learned...
When knitting hats, go smaller than I think necessary as it more likely than not fit well that way as opposed to being loose and sloppy.

Two more hats left to put that lesson to test, let's hope I pass.

Tuesday, November 24, 2009

Hats are no longer my friend…

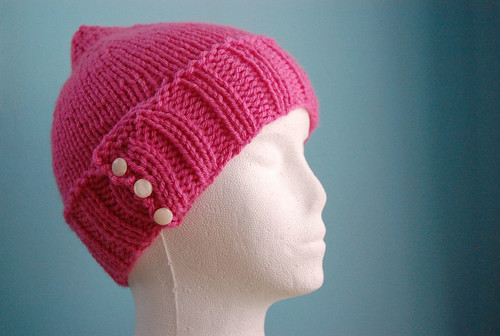
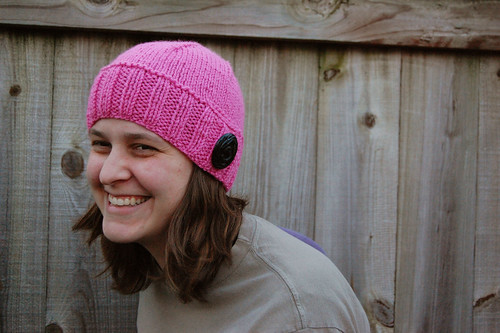
Bubble Yum Button Tab
Project #38 in '50 in 2009 Challenge' - Bubble Yum Button Tab

With no gauge information, I should have known this project was doomed to begin with but I continued on, decreasing the number of stitches hoping to make it an appropriate size for a 7 year old girl.

And boy, oh boy, those ribs can be deceiving. They look so tiny, but stretch SOOO big.

So after finishing this cute little button tab hat and putting it on the dummy head for pictures, I realized it was too big. So big.

My first instinct was to throw it in the frogging pile and cast on a new smaller version, but Mike convinced me to put it on…and it looked all right.

Now pink is not my top choice of color, and even further down on the list of colors that I consider wearing, but I got a new cream winter coat and have plans to make a scarf with my french souvenir yarn and I think it should look ok with it. Originally I was going back and forth on what to make with my purple souvenir yarn (hat or mitts) but now my decision is made…plus I don't think I can knit another hat! And the sad thing is I have to knit this hat again, plus a reknit of this one in a smaller gauge (back before I learned the hard way that a gauge swatch needs to be done).

Thursday, November 19, 2009

1st Annual Small Fox Ornament Swap: The Goods

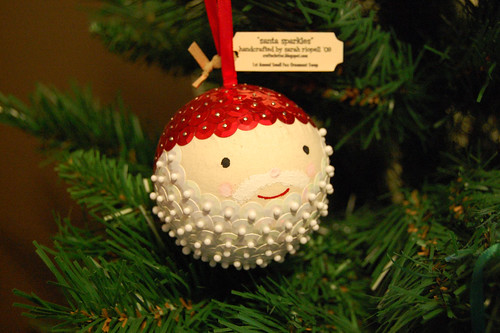
Santa Sparkles
Project #37 in '50 in 2009 Challenge'

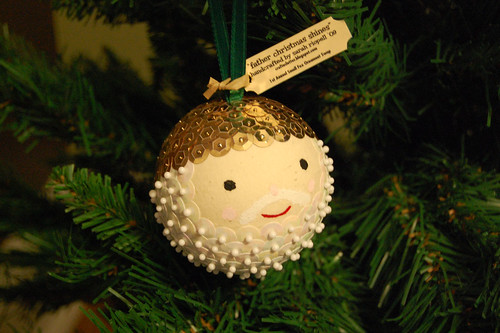
Approximately 1360 white ab 10mm sequins, 1360 white ball headed pins, 900 red 10mm sequins, 600 gold sequins and 1500 straight pins later, I am through with my part of the 1st Annual Small Fox Ornament Swap.

My right thumb and forefinger scream in pain at the slightest touch, but I am done. And I am happy with the results.

It sure did help sleeping on it because last night when I was painting little white moustaches on 12 little faces, I was seriously doubting my idea and more importantly, my execution.

But with whiten-downed pink for rosy little noses and cheeks, I am much happier than I was when I finally climbed into bed last night. Now that I look at them, they are very The Small Object-esque, though unintended is not a bad thing.

My Santas and Father Christmases, here, are simple, but cute…and sparkly.

Father Christmas Shines
Project #37 in '50 in 2009 Challenge'

I never thought I'd use sequins, but I've got to say I like the look. Kinda like fish gills. And when you look at the little box of multi-color jewel tones I had to buy because no store in town had any more 10mm red ones left for me to finish my half finished ornament they are even more enticing. I'm trying to figure out a way to use all my extras…if only pins weren't so expensive. I have an idea for something a bit out there, but I'm definitely going to have to find a source for cheaper bulk pins.

I started off strong a few weeks ago, working diligently as a knitting break, pushing sharp little pins. Sure, I tried to use a thimble, but those only really worked for the straight pins as the ball headed pins had more of a tendency to bend, therefore requiring a more nimble touch.

I was on a roll and then disaster struck. I was mid way through my sixth head and I ran out of red sequins. Quickly I headed to the store, only to find they were out of the larger 10mm red and using smaller reds was not an option as I was already going through a boatload of pins to begin with, I didn't need to double or triple that number. So I sped off to another store…no luck, and another…no luck, both stores' sequin sections were meager, so back to store #1 to pick up a multi-pack and some gold sequins. I figured I could pick enough reds out of the multi-pack to finish the ornament I had started and then the gold would help me create the remainder of my requirement as Father Christmas instead of Santa. Hats of to Jake for thinking of that one.

And soon, ok not so soon, I was left with 11 and 1/2 ornament heads. I had hopes of finishing 12, but I lost my last handful of ball headed pins somewhere between my living room and Panera on Craft Night. Go figure.

After staying up late to paint faces and then tagging & photographing each ornament as lunch today, I was able to box them up and send them on their merry way Priority (nothing but the best for my little creations). Now I wait a week or so for a magical box full of Christmas spirit to arrive on my doorstep. There are about 3 times as many participants as there are required ornaments, so despite being able to see what others have made in the Flickr pool, I really have NO idea what I'll end up with. Exciting, right?!


Saturday, November 14, 2009

Sweet Pea

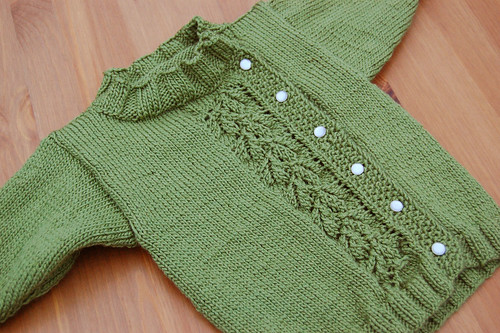
Emelyn's Baby Peapod Sweater
Project #36 in '50 in 2009 Challenge' - Emelyn's Baby Peapod Sweater

No luck in finishing this in less time that it took me to knit the last baby hat, not that I really expected to, but a girl can dream, right?

I've been wanting to knit up the Baby Peapod sweater since it made the free pattern rounds a couple years ago. Luckily I was smart that time, downloaded the pattern and filed it away because it is no longer available, not even in the magazine it originally appeared in (weird situation, it was pictured in the printed magazine but you had to go online to obtain the pattern, so you can't even buy an archive edition to get it).

Almost with every project I undertake, I realize more and more what an inexperienced knitter I really am. I had more hiccups than I'd like to admit on this one, especially since I was working on a tight deadline - but being the open person I am, I'll share them.

First kudos to me for actually doing gauge swatches. My first one was off, so I started a second. Upon realizing I modified my needles in the wrong direction, I ripped out and did a third (and got it right!).

Then the trouble begins.

After trying to do the bottom ribbing chart a few times and being completely unsuccessful, I gave up and did a simple 3x3 rib. My inexperience with charts must be evident, but how was I supposed to know that I needed to pick up where I left off in the row before instead of starting for the beginning of the second row.

All went pretty well from that point on…until I started to near the end and said, "where do the buttonholes go?!" Pulled out the pattern (since I was working on straight stockinette for a long time) and started to reread from the beginning. Oh crap, the buttonholes were supposed to be worked in at the very beginning.

No way was I going to start over especially as the countdown to baby was days as opposed to weeks. Instead I resolved to make snaps work…no matter what. I've only used snaps a couple times and never on a knitted garment so I was apprehensive, but I am happy to report that all is well. It was a bit difficult to get the pieces of each snap side aligned, but in the end all 6 are strongly in place.

So all that remains is to present the gift to new little Emelyn. She won't be able to wear it until next year (I decided to make 12mo size because the smallest size in the pattern is 3mo and there is a possibility that the weather would start to turn before she could even wear it), but hopefully it still get an Aww or two.

Tuesday, November 10, 2009

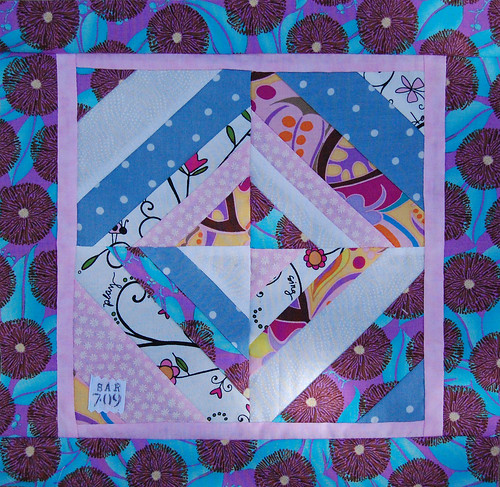
One for Me, One for You: July Results

July 2009 - Sarah's Square
My July Square
Project # 34 in '50 in 2009 Challenge'

July 2009 - Darcy's Square
Darcy's July Square


Sunday, October 25, 2009

1st Annual BYOP

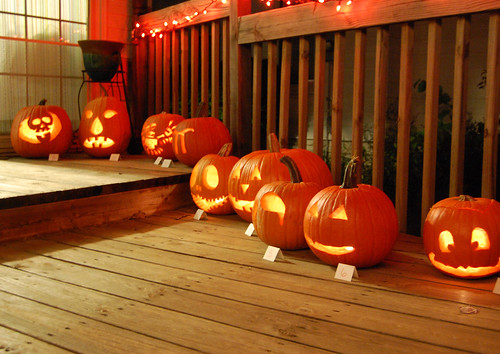
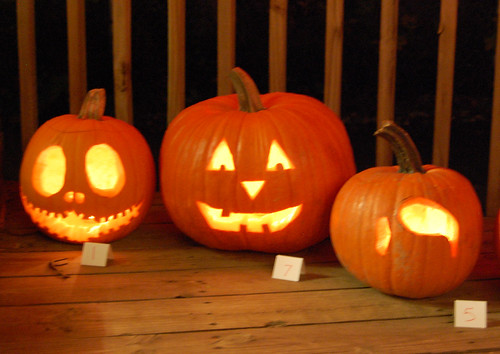
1st Annual BYOP Pumkin Carving Party

For many years, I have expressed desire to host a Halloween party. Not necessarily a costume party, but one celebrating the fun of fall - what better way to celebrate than with warm comfort food and pumpkin carving. The first year we had our own house, we had just moved into the house the month before and it felt like the house wouldn't be inviting. Last year, Halloween just snuck up on us and we couldn't pull it off. And this year, I almost let a vacation and overall social situation hesitance postpone it for another year, but Mike pushed me into sending out the invites and therefore planning the party.


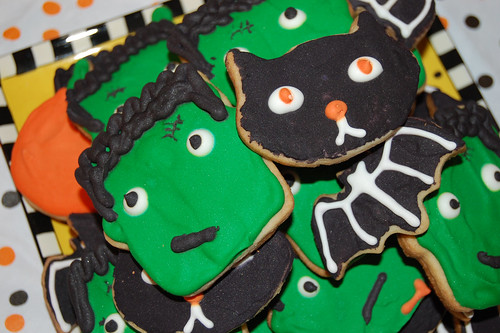
Halloween Cookies
Project #35 in '50 in 2009 Challenge'

What I was most excited about was a reason to cook the first real batch of Autumn comfort food of the season. And...tackling cookie decorating for a second time - especially after running across this blog post of tips from Sweetopia! Let me tell you, these turned out to be some of the best homemade cookies I've made, I even approved of their taste, and I am very much a lover of processed, perservative-filled cookies (I'll take break-n-bakes over homemade any day). It's strange because I've very much gotten out of the habit of using a lot of convenience foods, even things like taco seasoning, but when it comes to cookies, I have very particular tastes. Usually when I make cookies - yes, I still attempt to make cookies because normal people tend to like homemade cookies - I have a token sample, but the rest typically are left for Mike or visitors. Martha Stewart did me good (her Cookie Book - Cut Out Sugar Cookies) and I must say I've enjoyed a few of these in the past few days.

Anyways, I was excited to finally have a reason to use the Halloween cookie cutters I got a couple years ago, so I went all out. Searching for a recipe, looking up icing tips & trick, buying a rainbow pack of icing dye gel and then devoting several days to these cookies. I'm very happy with the results - especially when looking back on my first attempt (mistake #1: using store bought tubes of icing) - but I hope to try again soon as I suspect my icing needed more water so it could actually flood and I wouldn't need to smear. All in all, I decorated about 3 dozen Frankensteins, cats, bats and pumpkins, but was a fun-filled Friday night of listening to NPR well into the evening hours.

Besides the cookies, I made chili and corn bread; munchies like puppy chow, pumpkin seeds & buffalo chicken dip; a hot apple rum (as the signature drink); and savory hand pies, using my new apple & pumpkin hand pie molds from Williams-Sonoma, stuffed with sauage, feta, spinach, onion & mushrooms or potatoes, onion, bell peppers & cheddar. I'm going to have to think of a way to incorporate the hand pies into our next gathering, Thanksgiving, because they were really fun to make and delicious. It actually has me thinking that it may be a good idea to make some and freeze them already baked for easy lunches, so I won't need to rely on Hot Pockets so much.

Mine, the winner & Mike's
My Jack Skellington, the winning pumpkin & Mike's Rod Blagojevich's Hair

Besides the food, you know, there was an actual party with people going on and I think it went well. At first, it looked like it might only be Mike & I, another couple and a friend from Mike's work, but by the end of the night we had 13 people there for the duration, plus another 3 drop in later on in the night. And the best part was everyone (who was there for the duration) participated in pumpkin carving despite comments coming in such as fear of pumpkins (several people seriously expressed being creeped out by pumpkins) and thinking that pumpkin carving sounds like something women would be in to! I was so surprised that everyone was participating that though I was prepared with a special trophy, I hadn't thought through how we would actually give it away. Seriously I thought there may have only been a couple other people besides Mike & I that would have pumpkins. I'm glad everyone "let loose" and got into it because it was neat to see all the pumpkins lit up together. Kinda like our very own Jack-O-Latern Spectacular which was nice since I've managed to miss it the last two years. We ended up really lucking out weather-wise, too. The area's been plagued with lots of rain and cold lately, but the rain held off until about an hour after everyone went home at midnight and though it was chilly, it wasn't cold enough that with jackets and a little fire & hot apple rum, we couldn't stay outside for the whole party (double bonus for us because it means besides the kitchen, our cleaned house stayed clean - yay!).

I'm already thinking about next year, and planning a trip to the party store on November 1 in hopes of picking up some more of the trophies on sale. Hee hee.

Tuesday, October 13, 2009

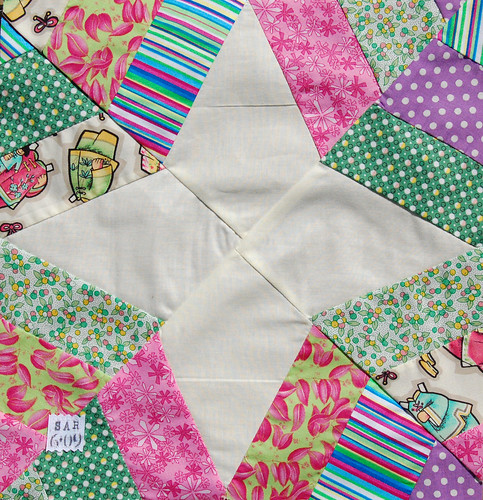
One for me, One for You: June Results

June 2009 - Sarah's Square
Sarah's June Square: Project #33 in '50 in 2009 Challenge'


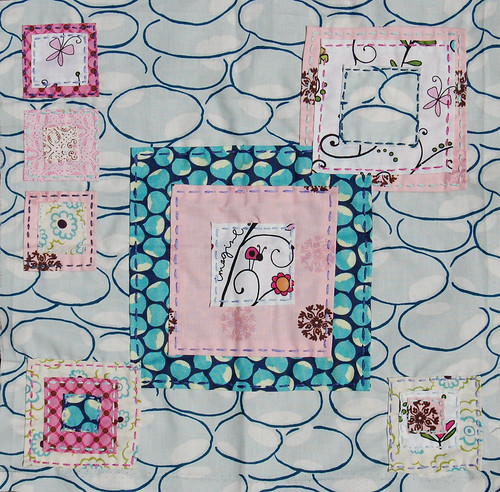
June 2009 - Darcy's Square
Darcy's June Square: 'Hip to Be Square'

Should I really even be tracking these by month anymore?

I mean, for heaven's sake, I just finished my so-called "June" square at the end of September…and really I only finished one of my two June squares. I've been kinda slacking off on my own versions of the square lately. Understandably, I hope, after finishing the yo-yo square for Darcy, I just didn't have it in me to look at those darn yo-yos any longer. It took me so long just to make all the required yo-yos for both squares that I just had to put them away for awhile. But recently, with both the June & July squares, since I am so so very late in doing them, I just wanted to get them out the door and into their new owner's hands. So one version of each was created and sent on their merry way. I cut everything in twos and I (obviously) document the finished product, so I'm not concerned about keeping up with the whole point of the project - that we'll have identical pieces.

Before I sent out my latest two squares, I laid all the square out on our bed just to see how much longer we need to keep going. And actually, with some sashing between the squares, I think just on more month (August) will be enough for a good size blanket. It won't be a bed blanket, but one large enough to cuddle on the couch and really that's all I'm looking for. Something big enough to actually cover me comfortably while laying on the couch (unlike my concert tee shirt quilt which requires curling into a ball to cover me fully).

Darcy actually has a pretty neat idea of how to quilt her version, which I am really excited to see. I, on the other hand, will probably just quilt around each square. The thing that has me hung up now is what color sashing I'll use. The colors of these blocks are all over the place. I'm not even sure a simple white or black will work as we have creams and browns interspersed throughout. I may have to get your opinions once I get everything done and laid out again. More ideas are better than too few, right?

Tuesday, September 29, 2009

When Will I Learn?

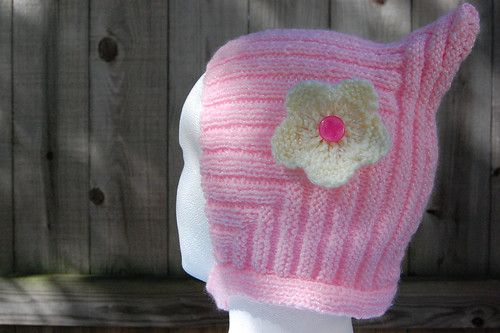
Pale Pink Stella Pixie Hat
Project #32 in '50 in 2009 Challenge' - Pale Pink Stella Pixie Hat

It only took 25 days to finish this slightly-bigger-than-baby hat. 25 days! For a hat. Granted that's from casting on my swatch gauge to completion of the little accent flower, but still that's an incredibly long time for a hat meant for a one-year-old.

Gosh, I hope it fits.

It's too small for my styro-head (but not by too much, obviously) and very stretchy, so hopefully my neglectful swatching doesn't bite me in the behind. I was just getting ready to leave for vacation, so I didn't have enough time to reswatch - I didn't want to lug an entire needle case with me. So I ended up knitting the 3-12 months size at a slightly larger gauge - thinking it should be a good size for a slightly older than one-year-old.

Most likely I will never find out if the hat's a good fit or not (the downside to making gifts for the non-crafty to give), which is bummer because I'm not really learning from my mistakes that way. I'm really trying to get myself in the proper frame of mind that swatching is important every single time. And that if the gauge isn't right the first (or second) time that means it is NECESSARY for me to do it again until I get it right. No guessing or figuring it will be ok – that is the only way I will know for sure if the item is a proper size and from there I'll just have to trust whoever created the pattern that the size knit will fit the size stated.

I just don't know why it's been such a tough lesson to learn.

Despite an ever-looming deadline (tick tock, that baby's going to be here before I know it), I'm determined to get my gauge right for my latest project, the Baby Peapod Sweater. And though I'm determined to not get lazy on my swatching, I'm really hoping it doesn't take me as long to complete this sweater as it did to make the Stella Pixie hat.

Though as long as I'm finished by our planned visit a week or two after the baby is born, I'll count myself victorious!

Friday, September 18, 2009

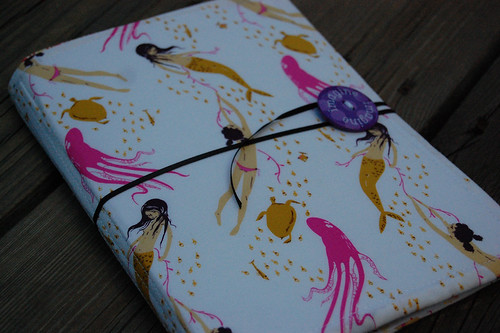
The Travel Agent: a notelet

Travel Document Note Taker - Close Up
Project #29 in '50 in 2009 Challenge'

As I'm still weeding through some 800+ images off two cameras taken during our European jaunt, I'll have to placate you with some more pre-vacation crafting instead of bragging, I mean, sharing insightful information regarding our trip. (If you would like a sneak peek at our adventure, feel free to take a look - I'm weeding thru/editing/uploading as fast as I can.)

If you don't really know me and Mike, I'll start off by saying we are both very money-conscious. We budget, we save, we have financial goals and we are both very much in sync on this matter. That being said we also enjoy a good getaway, seeing new things and having adventures together, so we make sure this is all part of our goals & budgeting.

We set out on this European adventure with a set amount we'd prefer to spend, but both decided that if we went over, as long as it wasn't outrageous, we were both fine with that. We wanted to enjoy our experience and not skimp - but we still wanted to know what we'd spent (roughly). We did the same thing last year on our cruise. Also we plan our trips from flights to accommodations to sites, etc completely by ourselves - no travel agents, etc - so we need a place to keep track of everything - boarding passes, Expedia reservation print outs, itinerary, budgets and so on. Last year we had a old ISU folder and some blank sheets ripped out of a notebook, which worked all right mainly because we were in one place, accommodation-wise, the whole trip. We could always head back to the room, dig the folder out of the bag and find what we needed. It wasn't the most attractive method, but it worked well enough especially since we didn't have too many additional expenditures or travel once we were on the boat. But this trip was much different. We were going to be almost constantly on the move, so I wanted something that was more compact and easier to tote around with me…plus I've always wanted to make one of Pink Chalk's Note Takers, what better excuse to buy the pattern than I needed it for vacation, right?


Travel Document Note Taker - Inside

I actually ended up making the Notelet, holding a 5x7 notepad instead of the legal pad. It gave me a large, tight pocket to hold all our print-outs and train tickets (which were shipped to us in advance), a small pocket which ended up being a great place to stash my extra memory card since I nixed the idea of bring the whole camera bag & instead made my Travel Taxi bag, and of course, a pocket that fit a small notepad filled with notes on itinerary, budgets, etc.

It ended up being the perfect size, fitting nicely in my Travel Taxi bag with my Passport Wallet, DSLR, and glasses (and during flight, a book, kleenex and a crochet project). And as an added bonus I was able to use some of my favorite fabrics on a project for myself!

It held up well over the course of 9 days, so it should last a few more vacations - which is great because those mermaids make me happy, and very much say 'vacation' to me. There is a strong possibility that I may put it into regular rotation of use (after my current daily notebook & it's twin are used up) kinda like that passport wallet was after the cruise last fall. It's been my everyday wallet ever since…though I did notice while in Paris that it was getting a bit shabby - nothing compared to the Travel Taxi bag, who's seam at the bias trim ripped at two spots on our very first day!

I know, I know. That says more about my craftsmanship than the bag design itself, but like I said in its post, I do need more practice with the whole sewing thing. I definitely hit the sewing machine too infrequently to have the skills…and perhaps I should learn to not do rush jobs. I'm pretty sure these are lessons I've sworn to learn from before, hee hee.

Saturday, September 12, 2009

More Practice Needed

Traveling Taxi Bag
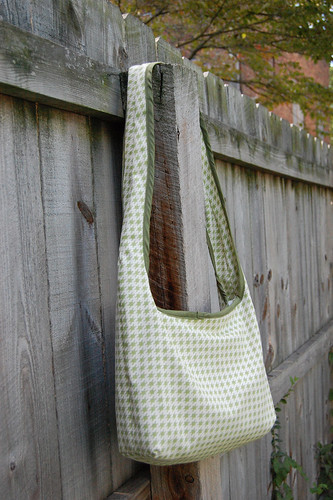
Project #31 in '50 in 2009 Challenge' - Travel Taxi Bag

In preparation for our trip to Europe, I wanted to create a travel bag that doesn't look like your typical travel purse - boxy, too small, nylon. Large enough to hold the DSLR, my large "passport" wallet, our travel plans portfolio as well as my glasses and the city maps we bought.

After searching through a few pattern company websites to no avail, I remembered that I have a relatively large collections of craft books, spanning subjects from knitting & crocheting to holiday crafts to sewing. So I pulled out a few and started flipping.

In Anna Maria Horner's Seams to Me, the Taxi Bag caught my eye...mostly like because of the awesome fabric she used in the photo. But there was a few problems with the original pattern - it was designed to be flung over the shoulder and it closed solely with a button & loop, not exactly ideal qualities in a bag to be used while trouncing around European cities known for gyspies.

So though I am still very novice in the realm of sewing, I set out to alter the pattern to lengthen the strap to lay across my body and to add a zipper to the construction.

Though not a perfect alteration (mostly in the zipper area), it was successful none the less. It zippers shut in a manner that will prohibit any hand from slipping in and out. It's not proper, but it works.